
How to Test a Transmission Solenoid Valve: A Step-by-Step Diagnostic Guide
In modern automatic transmission systems, transmission solenoid valves act as critical electro-hydraulic actuators. Controlled by the Transmission Control Module (TCM), they regulate fluid pressure and route oil to engage clutches and shift gears smoothly.
When a solenoid valve fails or sticks, it can cause severe drivability issues, including harsh shifting, slipping gears, transmission overheating, or triggering Limp Mode alongside diagnostic trouble codes (DTCs) like P0750–P0770.
Whether you are a professional automotive technician, fleet maintenance manager, or DIY enthusiast, this comprehensive guide will walk you through how to accurately test a transmission solenoid valve using standard diagnostic tools.
1. Common Symptoms of a Faulty Transmission Solenoid
Before dismantling the transmission pan, verify if the vehicle exhibits these classic symptoms:
- Delayed or Harsh Gear Shifts: Significant hesitation or violent engagement when upshifting or downshifting.
- Inability to Downshift / Upshift: The transmission remains locked in a single gear or skips specific gears.
- Transmission Slippage: The engine revs up, but power transfer to the wheels is delayed or weak.
- Check Engine Light (CEL) & DTCs: Common codes include:
- P0750 – P0754: Shift Solenoid A Malfunctions
- P0755 – P0759: Shift Solenoid B Malfunctions
- P0740 – P0744: Torque Converter Clutch (TCC) Solenoid Circuit Issues
- Limp Home Mode: The vehicle restricts gear selection (typically locking into 2nd or 3rd gear) to protect the gearbox from catastrophic mechanical damage.
2. Essential Tools Required for Testing
To conduct a thorough electrical and mechanical inspection, prepare the following equipment:
- OBD-II / Professional Diagnostic Scanner (Live data capability recommended)
- Digital Multimeter (DMM) (For resistance, continuity, and voltage testing)
- 12V DC Regulated Power Supply / Battery with Jumper Wires (With in-line fuse protection)
- Low-Pressure Regulated Compressed Air Source (0–30 PSI, optional for mechanical bench testing)
- Basic Hand Tools (Socket set, torque wrench, oil catch pan, gloves, eye protection)
- OEM Service Manual / Technical Specifications (To reference correct pinouts and Ohm ratings)
3. Step-by-Step Testing Procedure
Step 1: Scan for Diagnostic Trouble Codes (DTCs)
- Connect an advanced OBD-II scanner to the vehicle’s diagnostic port.
- Read all pending and active codes in the TCM / Engine module.
- Use the bidirectional control feature (if supported by your scan tool) to command individual solenoids ON/OFF and listen for an audible clicking sound.
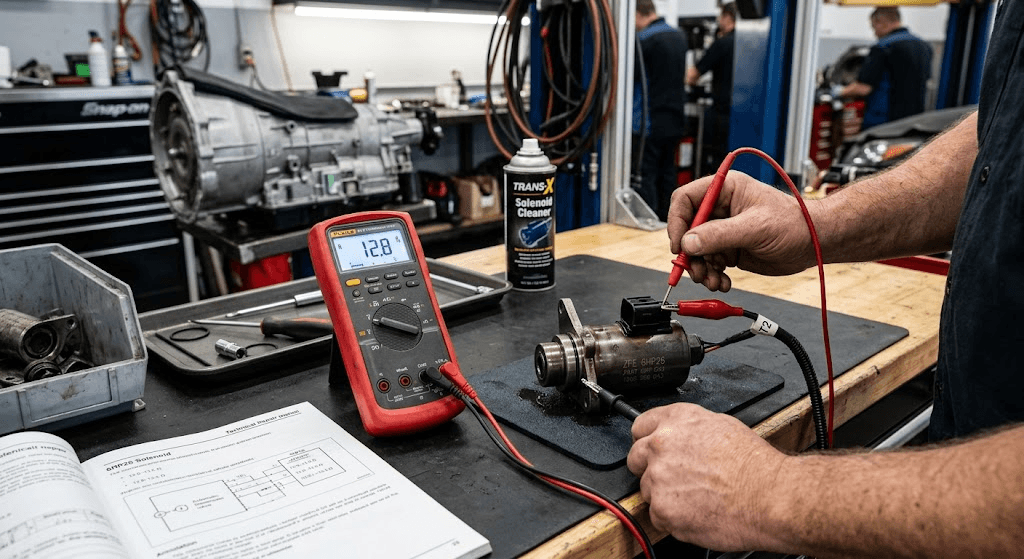
Step 2: Electrical Resistance (Ohm) Test on the Bench
Testing the internal electromagnetic coil resistance is the most direct way to identify an open circuit, shorted winding, or degraded coil.
- Access the Solenoid: Safely drain the automatic transmission fluid (ATF), remove the oil pan, and disconnect the wiring harness leading to the target solenoid valve.
- Set the Multimeter: Turn your multimeter dial to the Resistance ($\Omega$) setting (typically $200\,\Omega$ range).
- Measure Resistance:
- Two-Pin Solenoid: Place the red and black probes directly across the two electrical terminals.
- Single-Pin (Self-Grounding) Solenoid: Place one probe on the electrical terminal and the other probe firmly against the clean metallic body/bracket of the valve.
- Compare with OEM Specifications:
- Standard Shift Solenoids (On/Off): Typically range from $10\,\Omega$ to $30\,\Omega$.
- PWM / Linear Pressure Control Solenoids: Typically have lower resistance, around $3\,\Omega$ to $8\,\Omega$.
- Analyze the Readings:
- Reading shows $0\,\Omega$ (or near zero): Internal short circuit $\rightarrow$ Replace Solenoid.
- Reading shows $OL$ / $\infty$ (Infinite resistance): Open circuit / broken internal coil wire $\rightarrow$ Replace Solenoid.
- Out of Tolerance ($\pm 10\%+$ from OEM spec): Thermal or mechanical degradation $\rightarrow$ Replace Solenoid.
Step 3: Bench Actuation & Audible “Click” Test
Even if a coil passes electrical resistance tests, the internal plunger or pintle valve can still stick mechanically due to varnish or metal shavings.
- Connect a 12V DC power source using insulated jumper leads (ideally with a 5A in-line fuse).
- Ground one terminal and intermittently touch the positive 12V lead to the power terminal for 1–2 seconds at a time.(Caution: Do not leave continuous 12V applied for long periods to prevent coil overheating).
- Listen for Response:
- Crisp, distinct metallic “CLICK”: The electromagnetic coil and plunger are moving freely.
- Muffled, sluggish, or NO click: The internal plunger is jammed with contaminants or the coil cannot generate enough magnetic flux.
Step 4: Pneumatic & Fluid Sealing Check (Optional Advanced Bench Test)
For Variable Force Solenoids (VFS) and Pulse-Width Modulated (PWM) valves:
- Apply low-pressure compressed air (approx. 15–20 PSI) to the inlet port.
- Observe airflow through the outlet port before and after energizing the valve with 12V.
- Ensure there is zero excessive bypass leakage in the closed state and unobstructed flow in the open state.
4. Replacement vs. Cleaning: Professional Recommendations
- Cleaning: If the solenoid passes resistance testing and is merely clogged with fine clutch debris or oxidized fluid, ultrasonic cleaning in fresh solvent can sometimes restore function.
- Replacement: If the resistance reading is out of range, the coil is shorted/opened, or the valve seat is physically scored, complete replacement with an OEM-grade or precision-engineered aftermarket solenoid valve is mandatory.
Conclusion & Quality Sourcing
Accurate diagnosis prevents unnecessary transmission rebuilds and ensures peak vehicle reliability. When replacement is required, choosing precision-machined, 100% factory-tested solenoid valves ensures OEM fitment and lasting durability.
Looking for reliable transmission solenoid valves and electro-hydraulic control components?
Explore our comprehensive product catalog or contact our engineering team directly for OEM/ODM solutions, bulk inquiries, and cross-reference assistance.